Tutorial : Handling game scenes and screen scaling with Pixi
Most game tutorials I’ve read speak about how to draw things or write game logic …etc, but when you develop a game,beside the game itself there is also UI and scene transitions that need to be implemented.
This tutorial I will show you how to handle game scenes, pause/resume your game and automatically scale the display to make your game mobiles/tablets friendly 🙂
//The goal of this tutorial is to get this result //
Introduction
as a rendering engine I’ll use Pixi ; a powerful and well designed HTML5 renderer that provide a common API for both canvas2D and WebGL. Pixi can autodetect the presence of WebGL capabilities and use it, but you can also force it to use Canvas2D or WebGL.
I’ll use TypeScript as programming language, and Visual Studio 2012 for Web as IDE.
to use Pixi with TypeScript I highly recommend this TS definition : pixi.d.ts
here is how I organized my code
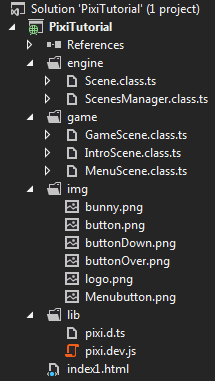
Note that this is the final structure
engine folder contains common classes
game folder contain classes specific to our project
lib folder contains third party libraries (here we have pixi and its TS definition file)
Game scenes
Scene class
Let’s start by creating the scene class.
a scene is basically a Pixi Stage object, witch can be paused/resumed/updated
|
1 2 3 4 5 6 7 8 9 10 11 12 13 14 15 16 17 18 19 20 21 22 23 24 25 26 27 28 29 30 31 |
///<reference path="../lib/pixi.d.ts" /> // Module module tuto.Ezelia { export class Scene extends PIXI.Stage { private paused: bool = false; private updateCB = function () { }; constructor(background:number) { super(background); } public onUpdate(updateCB: () => void ) { this.updateCB = updateCB; } public update() { this.updateCB(); } public pause() { this.paused = true; } public resume() { this.paused = false; } public isPaused() { return this.paused; } } } |
Note how we extended PIXI.Stage object using TypeScript extends keyword even if Pixi has not been written in TypeScript
the onUpdate() method will register the update callback witch will be used to update game objects states. (will see later that we can use the onUpdate() method or override update() method in a subclass).
ScenesManager class
To handle scenes will create a ScenesManager
|
1 2 3 4 5 6 7 8 9 10 11 12 13 14 15 16 17 18 19 20 21 22 23 24 25 26 27 28 |
///<reference path="../lib/pixi.d.ts" /> ///<reference path="Scene.class.ts" /> // Module module tuto.Ezelia { export class ScenesManager { private static scenes: any = {}; // should be hashmap but a JS object is fine too :) public static currentScene: Scene; public static renderer: PIXI.IRenderer; public static create(width: number, height: number) { if (ScenesManager.renderer) return this; ScenesManager.renderer = PIXI.autoDetectRenderer(width, height); document.body.appendChild(ScenesManager.renderer.view); requestAnimFrame(ScenesManager.loop); return this; } private static loop() { requestAnimFrame(function () { ScenesManager.loop() }); if (!currentScene || currentScene.isPaused()) return; currentScene.update(); ScenesManager.renderer.render(currentScene); } } //# next code block } |
Since we are supposed to have only one ScenesManager in the game, I declared all it’s functions as static.The create() method will initiate Pixi renderer and starts the gameloop immediately.
The loop() method will check if a current Scene exists and is not paused, the update and render it.
now we’ll add two more methods to the ScenesManager to create and switch scenes.
the following code replace “//# next code block” above
|
1 2 3 4 5 6 7 8 9 10 11 12 13 14 15 16 17 18 19 |
public static createScene(id: string): Scene { if (ScenesManager.scenes[id]) return undefined; var scene = new Scene(); ScenesManager.scenes[id] = scene; return scene; } public static goToScene(id: string): bool { if (ScenesManager.scenes[id]) { if (ScenesManager.currentScene) ScenesManager.currentScene.pause(); ScenesManager.currentScene = ScenesManager.scenes[id]; ScenesManager.currentScene.resume(); return true; } return false; } |
here, the names are explicit, and don’t need further explanation I think 😉
not the goToScene() method will pause the current scene before switching to another scene, so we preserve the scene state.
let’s test this code 🙂
create an html file and add references to Pixi.js, ScenesManager.class.js and Scene.class.js
|
1 2 3 |
<script src="lib/pixi.dev.js"></script> <script src="engine/ScenesManager.class.js"></script> <script src="engine/Scene.class.js"></script> |
then add this script block before </body>
|
1 2 3 4 5 6 7 8 9 10 11 12 13 14 15 16 17 18 19 20 21 22 23 24 25 26 27 28 |
<script> //get reference of ScenesManager; var scenesManager = tuto.Ezelia.ScenesManager; //create scenesManager.create(300, 400); //create a the game scene var game = scenesManager.createScene('game'); //add a bunny :) var bunny = PIXI.Sprite.fromImage("img/bunny.png"); // center the sprites anchor point bunny.anchor.x = 0.5; bunny.anchor.y = 0.5; // move the sprite t the center of the screen bunny.position.x = 50; bunny.position.y = 50; game.addChild(bunny); //switch to 'game' Scene scenesManager.goToScene('game'); //register update event game.onUpdate(function () { bunny.rotation += 0.1; }); </script> |
result :
Switch scenes
you noticed that we added our game logic (the moving bunny) to a Scene instance, in a real life case, where you have thosands of lines of code, this aproach will make your code unreadable (don’t forget that we’ll add our menus and scenes logic aswell).
so a cleaner aproach is to extend our Scene Class and allow ScenesManager to create classes of different types.
this need a modification in createScene method, witch becomes
|
1 2 3 4 5 6 7 |
public static createScene(id: string, TScene: new () => Scene = Scene): Scene { if (ScenesManager.scenes[id]) return undefined; var scene = new TScene(); ScenesManager.scenes[id] = scene; return scene; } |
what we did here is replacing “new Scene()” with a more generic call “new TScene()”
where TScene is declared as “TScene: new () => Scene = Scene”, this syntax only means that we accept here a Class of Type Scene, and it’s default value is Scene.
we can get the same result by just declaring the function like this : public static createScene(id: string, TScene:any): Scene {…} but well lose TypeScript compile type type checking.
now we’ll create a GameScene witch extends Scene and have all game logic.
|
1 2 3 4 5 6 7 8 9 10 11 12 13 14 15 16 17 18 19 20 21 22 23 24 25 26 27 28 29 30 31 |
///<reference path="engine/Scene.class.ts" /> ///<reference path="lib/pixi.d.ts" /> module tuto.Ezelia { // Class export class GameScene extends Scene { private bunny: PIXI.Sprite; constructor() { super(); //add a bunny :) this.bunny = PIXI.Sprite.fromImage("img/bunny.png"); // center the sprites anchor point this.bunny.anchor.x = 0.5; this.bunny.anchor.y = 0.5; // move the sprite t the center of the screen this.bunny.position.x = 50; this.bunny.position.y = 50; this.addChild(this.bunny); } public update() { super.update(); this.bunny.rotation += 0.1; } } } |
and our script main script block becomes
|
1 2 3 4 5 6 7 8 9 10 11 12 13 |
<script> //get reference of ScenesManager; var scenesManager = tuto.Ezelia.ScenesManager; //create scenesManager.create(300, 400); //create a the game scene var game = scenesManager.createScene('game', tuto.Ezelia.GameScene); var blank = scenesManager.createScene('blank'); scenesManager.goToScene('game'); </script> |
see how all game logic is now hidden , and the code becomes mutch cleaner.
result :
Intro scene and menu scene.
Now we’ll create two scenes to show our logo with a nice fade effect then show a menu with a clickable button before starting the game.
the game scene will contain a button allowing us to go back to the menu.
intro scene
|
1 2 3 4 5 6 7 8 9 10 11 12 13 14 15 16 17 18 19 20 21 22 23 24 25 26 27 28 29 30 31 32 33 34 35 36 37 |
///<reference path="../engine/ScenesManager.class.ts" /> ///<reference path="../engine/Scene.class.ts" /> ///<reference path="../lib/pixi.d.ts" /> module tuto.Ezelia { // Class export class IntroScene extends Scene { private logo: PIXI.Sprite; constructor() { super(); this.setBackgroundColor(0xffffff); this.logo = PIXI.Sprite.fromImage("img/logo.png"); this.addChild(this.logo); this.logo.scale.x = ScenesManager.defaultWidth/250; this.logo.scale.y = this.logo.scale.x; this.logo.anchor.x = 0.5; this.logo.anchor.y = 0.5; this.logo.alpha = 0; // move the sprite to the center of the screen this.logo.position.x = ScenesManager.defaultWidth / 2; this.logo.position.y = ScenesManager.defaultHeight /2; } public update() { super.update(); if (this.logo.alpha < 1) this.logo.alpha += 0.01; else ScenesManager.goToScene('menu'); } } } |
Menu scene
almost everything in the following class is taken from this pixi sample, I just added a control on event to not trigger them if the current scene is not active .
note : while writing this tutorial, Pixi seems to interact with objects even if they are no more visible, this is why I added a if (_this.isPaused()) return; control.
there is a pull request on pixi github repository to fix this, so the control will no more be necessary.
no magic here 🙂 just make sure you set interactive your scene and all buttons you add by calling setInteractive(true)
|
1 2 3 4 5 6 7 8 9 10 11 12 13 14 15 16 17 18 19 20 21 22 23 24 25 26 27 28 29 30 31 32 33 34 35 36 37 38 39 40 41 42 43 44 45 46 47 48 49 50 51 52 53 54 55 56 57 58 59 60 61 62 63 64 65 66 67 68 69 70 71 72 73 74 75 76 77 78 79 80 81 82 83 84 85 86 87 88 89 90 91 92 93 94 95 96 97 |
///<reference path="../engine/ScenesManager.class.ts" /> ///<reference path="../engine/Scene.class.ts" /> ///<reference path="../lib/pixi.d.ts" /> module tuto.Ezelia { // Class export class MenuScene extends Scene { private button: PIXI.Sprite; private textureButton: PIXI.Texture; private textureButtonDown: PIXI.Texture; private textureButtonOver: PIXI.Texture; constructor() { super(); this.setBackgroundColor(0xffffff); this.textureButton = PIXI.Texture.fromImage("img/button.png"); this.textureButtonDown = PIXI.Texture.fromImage("img/buttonDown.png"); this.textureButtonOver = PIXI.Texture.fromImage("img/buttonOver.png"); this.button = new PIXI.Sprite(this.textureButton); // Scaling and positionning this.button.scale.x = ScenesManager.defaultWidth / 400; this.button.scale.y = this.button.scale.x; this.button.anchor.x = 0.5; this.button.anchor.y = 0.5; // move the sprite to the center of the screen this.button.position.x = ScenesManager.defaultWidth / 2; this.button.position.y = ScenesManager.defaultHeight / 2; // make the button interactive.. this.button.setInteractive(true); this._registerEvents(); this.addChild(this.button); this.setInteractive(true); } private _registerEvents() { var _this = this; // set the mousedown and touchstart callback.. this.button.mousedown = this.button.touchstart = function (data) { if (_this.isPaused()) return; this.isdown = true; this.setTexture(_this.textureButtonDown); this.alpha = 1; } // set the mouseup and touchend callback.. this.button.mouseup = this.button.touchend = function (data) { if (_this.isPaused()) return; this.isdown = false; if (this.isOver) { this.setTexture(_this.textureButtonOver); } else { this.setTexture(_this.textureButton); } } // set the mouseover callback.. this.button.mouseover = function (data) { if (_this.isPaused()) return; this.isOver = true; if (this.isdown) return; this.setTexture(_this.textureButtonOver) } // set the mouseout callback.. this.button.mouseout = function (data) { if (_this.isPaused()) return; this.isOver = false; if (this.isdown) return this.setTexture(_this.textureButton) } this.button.click = this.button.tap = function (data) { if (_this.isPaused()) return; ScenesManager.goToScene('game'); } } } } |
Game scene
here I’ll just add a button, when clicked will go back to the menu scene.
in the GameScene constructor we’ll add
|
1 2 3 4 5 6 7 8 9 10 11 12 13 |
"] var _this = this; var button = new PIXI.Sprite(PIXI.Texture.fromImage("img/button.png")); button.position.x = ScenesManager.defaultWidth - 200; button.scale.x = 0.5; button.scale.y = 0.5; button.click = button.tap = function (data) { if (_this.isPaused()) return; ScenesManager.goToScene('menu'); } button.setInteractive(true); this.addChild(button); this.setInteractive(true); |
and finally we need to add new scenes to the main script
|
1 2 3 4 5 6 7 8 9 10 11 12 13 14 15 |
<script> //get reference of ScenesManager; var scenesManager = tuto.Ezelia.ScenesManager; //note the scale parameter is set to true scenesManager.create(320, 480); //create a the game scene var game = scenesManager.createScene('game', tuto.Ezelia.GameScene); var intro = scenesManager.createScene('intro', tuto.Ezelia.IntroScene); var menu = scenesManager.createScene('menu', tuto.Ezelia.MenuScene); scenesManager.goToScene('intro'); </script> |
Scaling to screen size
we have now a working scenes transitions, and interactive elements.
The last step in this tutorial is to scale the scenes so they allways fits the display while keeping aspect ratio.
here we’ll need to maintain default width and height, current with and height and a ratio to rescale all other objects, so first let’s add some variables to ScenesManager class
|
1 2 3 4 5 |
public static ratio:number = 1; public static defaultWidth: number; public static defaultHeight: number; public static width: number; public static height: number; |
… and a private function that will calculate the ratio and resize Pixi display accordingly
|
1 2 3 4 5 6 |
private static _rescale() { ScenesManager.ratio = Math.min(window.innerWidth / ScenesManager.defaultWidth, window.innerHeight / ScenesManager.defaultHeight) ScenesManager.width = defaultWidth * ScenesManager.ratio; ScenesManager.height = defaultHeight * ScenesManager.ratio; ScenesManager.renderer.resize(ScenesManager.width, ScenesManager.height); } |
we also need to modify ScenesManager.create() method to handle both cases : when we need automatic rescale and when we don’t need it
|
1 2 3 4 5 6 7 8 9 10 11 12 13 14 15 |
public static create(width: number, height: number, scale:bool=false) { if (ScenesManager.renderer) return this; this.defaultWidth = ScenesManager.width = width; this.defaultHeight = ScenesManager.height = height; ScenesManager.renderer = PIXI.autoDetectRenderer(ScenesManager.width, ScenesManager.height); document.body.appendChild(ScenesManager.renderer.view); if (scale) { ScenesManager._rescale(); window.addEventListener('resize', ScenesManager._rescale, false); } requestAnimFrame(ScenesManager.loop); return this; } |
while writing this tutorial, I thought that scaling a Pixi Stage (remember our scenes extends PIXI.Stage) was enought to scale all its children so I only had to multiply my scenes scale.x/y value by ratio to get everything scaled …. I was wrong 🙂
actually, this don’t seem to work, don’t know if it’s a normal behaviour or an issue … any whay I came up with a workaround.
let’s handle the scaling of game objects
first we’ll add a method to rescale all children of a Pixi DisplayObject (the parent of all PIXI objects)
|
1 2 3 4 5 6 7 8 9 10 11 12 |
private static _applyRatio(displayObj: PIXI.DisplayObject, ratio: number) { if (ratio == 1) return; var object: any = displayObj; object.position.x = object.position.x * ratio; object.position.y = object.position.y * ratio; object.scale.x = object.scale.x * ratio; object.scale.y = object.scale.y * ratio; for (var i = 0; i < object.children.length; i++) { ScenesManager._applyRatio(object.children[i], ratio); } } |
then we’ll modify the ScenesManager.loop() method so that we apply the ratio before rendering and restore it back after, so everything is transparent while manipulating your game objects :
|
1 2 3 4 5 6 7 8 9 10 11 12 |
private static loop() { requestAnimFrame(function () { ScenesManager.loop() }); if (!currentScene || currentScene.isPaused()) return; currentScene.update(); ScenesManager._applyRatio(currentScene, ScenesManager.ratio); //scale to screen size ScenesManager.renderer.render(currentScene); ScenesManager._applyRatio(currentScene, 1/ScenesManager.ratio); //restore original scale } |
everything is now ready, we just need to modify our main html file to ask the ScenesManager to rescale display
|
1 2 3 4 5 6 7 8 9 10 11 12 13 14 15 |
<script> //get reference of ScenesManager; var scenesManager = tuto.Ezelia.ScenesManager; //note the scale parameter is set to true scenesManager.create(320, 480, true); //create a the game scene var game = scenesManager.createScene('game', tuto.Ezelia.GameScene); var intro = scenesManager.createScene('intro', tuto.Ezelia.IntroScene); var menu = scenesManager.createScene('menu', tuto.Ezelia.MenuScene); scenesManager.goToScene('intro'); </script> |
Click here to open the final result ,
resize the window and see how the display size is automatically scaled 🙂
Download the full source code
I hope that this tutorial will help you in your mobile game dev 🙂 …
comments and/or suggestions are welcome
