Hook layer for Android and iOS [Buildbox like a boss]
In this article we will add a hook layer to Buildbox Android export.
This hook layer will later give us the possibility to add custom services to Buildbox games, such as game analytics, achievements, multiple leaderboards, and even Everyplay video sharing service !
What’s a hook layer, why do we need it ?
Buildbox don’t provide any official way to hook events from code, except for custom ad networks.
The hook layer will make it possible to detect some important game events and allow us to execute custom code when they occure.
in this article we’ll add a hook layer which will detect the following events :
- Custom button clicks.
- play start (detected via a start button click),
- play gameover,
- score submit (with score value),
such events are important to detect : let’s say you want to unlock an achievement depending on the score value, for this you’ll need to know when the player loose (gameover event) and what is his score value.
Limitations :
Please note that this hook layer is a “hack”, it means that it use unofficial event detection code and could be broken by future Buildbox releases if the Buildbox development team decide to change the code behaviour.
the present code was tested with buildbox 2.1.x and 2.2.x .
Let’s start !
Creating a buildbox project
First we’ll create a buildbox project to which we’ll apply the modifications.
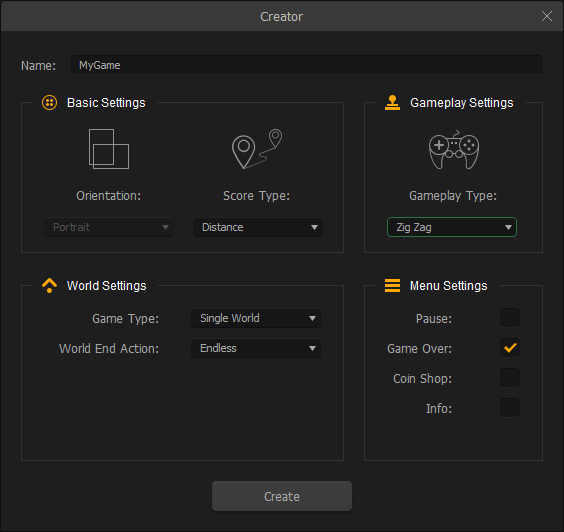
- Start buildbox and click “Create New”
- in the project creator give a name to your project, I’ll use MyGame for this tutorial
(MyGame will refer to buildbox project in the rest of this tutorial) - choose a game type from the provided templates (I’ll use ZigZag in this tutorial)
- click “Create”
- in the project creator give a name to your project, I’ll use MyGame for this tutorial
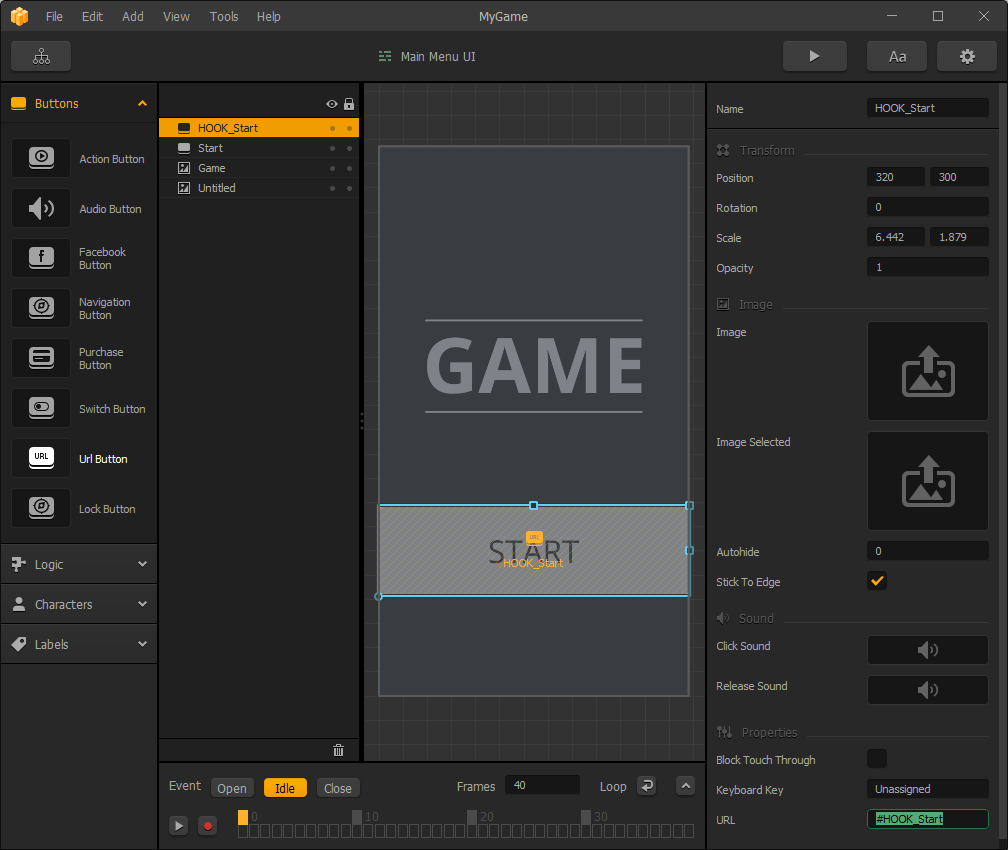
- Switch to the Game Mind Map view and double click “Main Menu UI”
- Add an “Url button” and put it on top of the start button, resize it to fit exactly the size of start button.
- uncheck “Block Touch Through”
- set Url value to “#HOOK_Start”
- set the name to “HOOK_Start”
Explanation :
Our hook layer will use url buttons to trigger custom actions, and to distinguish real url buttons from the hooked ones, we’ll prefix the hooked ones with “HOOK_” prefix.
Unchecking “Block Touch Through” will result in triggering both the Url button and the start button. so when the player will click on start button, he’ll actually also trigger url button.
Our hook layer will detect the url button click, and from the custom URL “#HOOK_Start” it’ll know which custom code to execute.
you can download the resulting bbdoc below
Android Hook Layer
Make an android export to (we’ll assume that the export is located in build\mygame-android )
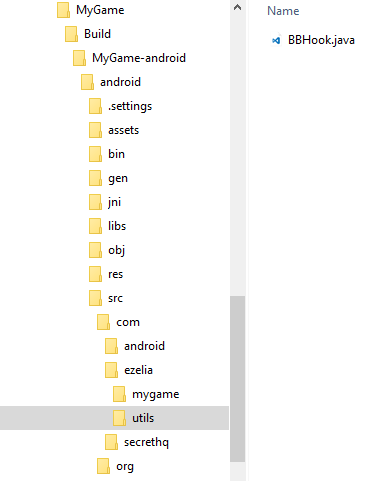
In your exported project open build\mygame-android\android\src folder.
Create com\ezelia\utils folder, and put BBHook.java file inside it.
your folder hierarchy should look like this.
now open src\secrethq\utils\PTServicesBridge.java and apply the following modifications
after
|
1 |
import android.content.res.Configuration; |
add
|
1 |
import com.ezelia.utils.BBHook; |
Modify initBridge function to :
|
1 2 3 4 5 6 7 8 9 10 11 12 13 14 15 16 17 18 19 20 21 22 23 24 25 26 27 28 |
// public static void initBridge(Cocos2dxActivity activity, String appId){ Log.v(TAG, "PTServicesBridge -- INIT"); PTServicesBridge.s_activity = new WeakReference<Cocos2dxActivity>(activity); PTServicesBridge.activity = activity; //BBHook BBHook.init(activity, null); if(appId == null || appId.length() == 0 || appId.matches("[0-9]+") == false){ return; } // Create a GoogleApiClient instance PTServicesBridge.mGoogleApiClient = new GoogleApiClient.Builder(PTServicesBridge.activity) .addApi(Plus.API).addScope(Plus.SCOPE_PLUS_LOGIN) .addApi(Games.API).addScope(Games.SCOPE_GAMES) .addConnectionCallbacks(instance()) .addOnConnectionFailedListener(instance()) .build(); //BBHook BBHook.init(activity, PTServicesBridge.mGoogleApiClient); } |
modify openUrl function to :
|
1 2 3 4 5 6 7 8 9 10 11 12 13 14 15 16 17 18 19 20 21 22 23 24 25 26 27 |
// public static void openUrl( String url ){ Log.v(TAG, "PTServicesBridge -- Open URL " + url); //BBHook if (url.startsWith(BBHook.HOOK_PREFIX)) { BBHook.handleHookUrl(url); return; } PTServicesBridge.urlString = url; PTServicesBridge.s_activity.get().runOnUiThread( new Runnable() { public void run() { try { final Intent intent = new Intent(Intent.ACTION_VIEW).setData(Uri.parse(PTServicesBridge.urlString)); PTServicesBridge.activity.startActivity(intent); } catch(Exception e) { //Print exception Log.d(TAG, "OpenURL: Failed."); e.printStackTrace(); } } }); } |
Modify submitScrore function to :
|
1 2 3 4 5 6 7 8 9 10 11 12 13 14 15 16 17 18 19 20 21 22 23 24 |
// public static void submitScrore( int score ){ Log.v(TAG, "PTServicesBridge -- Submit Score " + score); //BBHook BBHook.onSubmitScore(score); if(PTServicesBridge.mGoogleApiClient == null || PTServicesBridge.mGoogleApiClient.isConnected() == false){ Log.e(TAG, "Google play Servioces is not sigend"); return; } String leaderboardId = PTServicesBridge.getLeaderboardId(); if(leaderboardId == null || leaderboardId.isEmpty()){ return; } PTServicesBridge.scoreValue = score; if ( PTServicesBridge.mGoogleApiClient.isConnected() ) { Games.Leaderboards.submitScore(PTServicesBridge.mGoogleApiClient, leaderboardId, PTServicesBridge.scoreValue); } } |
modify isGameServiceAvialable function to :
|
1 2 3 4 5 6 7 8 9 10 11 |
// public static boolean isGameServiceAvialable( ){ Log.v(TAG, "PTServicesBridge -- Is Game Service Avialable "); //BBHook BBHook.onGameOver(); return (PTServicesBridge.mGoogleApiClient != null && PTServicesBridge.mGoogleApiClient.isConnected()); } |
at this point the hook layer is ready, now we can add custom code to BBHook.java to handle our custom events.
Testing the hook
To illustrate that the hook is working we’ll show a toast message for game start and game over events.
Edit BBHook.java file
add the following imports
|
1 2 3 4 |
// import android.widget.Toast; import android.view.Gravity; |
Modify onGenericEvent function to :
|
1 2 3 4 5 6 7 8 9 10 11 12 13 14 15 16 17 18 19 20 21 |
// public static void onGenericEvent(String event) { Log.v(TAG, "generic event " + event); if (event.equals("Start")) { BBHook.activity.runOnUiThread(new Runnable() { @Override public void run() { Toast toast= Toast.makeText(BBHook.activity, "Event:Game start ...", Toast.LENGTH_LONG); toast.setGravity(Gravity.TOP|Gravity.CENTER, 0, 0); toast.show(); } }); return; } } |
Note: The above code is triggered when the player click on a Url button with url value set to #HOOK_Start.
using the same logic you can create your custom hooked buttons : just create an url button with a url prefixed with #HOOK_ ; let’s say #HOOK_MyEvent, then add a conditional code inside onGenericEvent method, in our case the if syntax would be if (event.equals(“MyEvent”)) { … }
Modify onGameOver function to :
|
1 2 3 4 5 6 7 8 9 10 11 12 13 14 15 16 17 |
// public static void onGameOver() { Log.v(TAG, "onGameOver "); BBHook.activity.runOnUiThread(new Runnable() { @Override public void run() { Toast toast= Toast.makeText(BBHook.activity, "Event:Game over ...", Toast.LENGTH_LONG); toast.setGravity(Gravity.TOP|Gravity.CENTER, 0, 0); toast.show(); } }); } |
Now build and run the game on your mobile.
when you click start you should see a toast message saying “Event:Game start ”
when you loose you should see the a toast message saying “Event:Game over”
Congratulations, your hook layer for android is ready 🙂
iOS Hook Layer
Make an iOS export to (we’ll assume that the build\mygame-ios
Open your exported project using xCode
Download the hook files and copy them inside the project.
you should have something like this
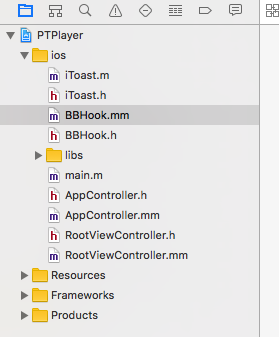
BBHook.m and BBHook.h are the custom hook layer, iToast.m and iToast.h are helper files which let us display toast messages similar to Android.
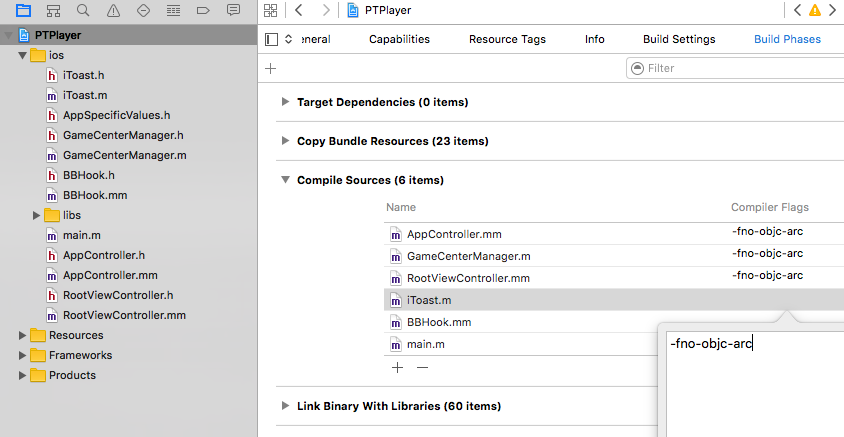
to use iToast code you need a small configuration, otherwise you’ll get a compilation error.
click on PTPlayer in the project hierarchy then Build Phases > Compile Sources
double click on the Compile Flags column beside iToast.m and add “-fno-objc-arc”
now edit AppController.mm
after
|
1 |
#import "models/PTModelController.h" |
add
|
1 |
#import "BBHook.h" |
Edit didFinishLaunchingWithOptions method and add the following code between mc->clean() and return YES lines :
|
1 |
[BBHook initViewController:viewController]; |
the bottom part of didFinishLaunchingWithOptions method should look like :
|
1 2 3 4 5 6 7 8 9 10 11 12 13 14 |
// printf("GL_VENDOR: %s\n", glGetString(GL_VENDOR)); printf("GL_RENDERER: %s\n", glGetString(GL_RENDERER)); printf("GL_VERSION: %s\n", glGetString(GL_VERSION)); cocos2d::CCApplication::sharedApplication()->run(); //clean up main model controller before starting loading Objects form XML files mc->clean(); [BBHook initViewController:viewController]; return YES; } |
at this point, the hook layer is ready for iOS, we can add custom code to BBHook.mm to handle custom events
Testing iOS hook
Let’s add Toast messages to check that events are correctly detected, the same logic is used as in Android code.
Open BBHook.mm file
Modify onGenericEvent method to
|
1 2 3 4 5 6 7 8 9 10 11 12 |
// + (void) onGenericEvent:(NSString*) event { NSLog(@"%@ ::", event); if ([event isEqualToString:@"Start"]){ [[[[iToast makeText:NSLocalizedString(@"Event:Game Start ...", @"")] setGravity:iToastGravityTop] setDuration:iToastDurationLong] show]; } } |
Modify onGameOver method to
|
1 2 3 4 5 6 7 8 |
// + (void) onGameOver { [[[[iToast makeText:NSLocalizedString(@"Event:Game Over ...", @"")] setGravity:iToastGravityTop] setDuration:iToastDurationLong] show]; } |
Build and run your project.
you’ll notice the toast messages when clicking starting the game and on gameover.
Note :
if you export the game to the same folder, Buildbox will overwrite the modified files.
one easy solution to avoid modifying the files each time is to keep a copy of modified files in a safe place, and replacing the original one each time you export a new project.
for android, you need to backup the following files : BBHook.java, PTServiceBridge.java
for iOS you need to backup the following files : BBHook.mm, BBHook.h, AppController.mm
Conclusion
In this tutorial we created a hook layer allowing us to trigger custom events and use them to run custom code.
we still didn’t add anything interesting to our project (except displaying toast messages), but this hook layer is the base for interesting addition we’ll see in next tutorials.
it’s important to have it up and running, and understand how it work, since this is the base for setting up multiple leaderboards, achievements, game analytics and everyplay video recording service.
you can do a simple exercice to check that you understand how this hook layer work : modify the buildbox game and add a hook code to display a Toast message (“Event:replay”) when the player loose and click on “Replay” button. if you do this correctly, you’re redy for next tutorials 🙂
You liked our content ? subscribe and get free resources to create your games