EZGUI : The missing GUI Library for Pixi.js and Phaser.io
Today we are glad to introduce EZGUI,
a GUI library to simplify GUI creation for PIXI.js and Phaser.io game developers.
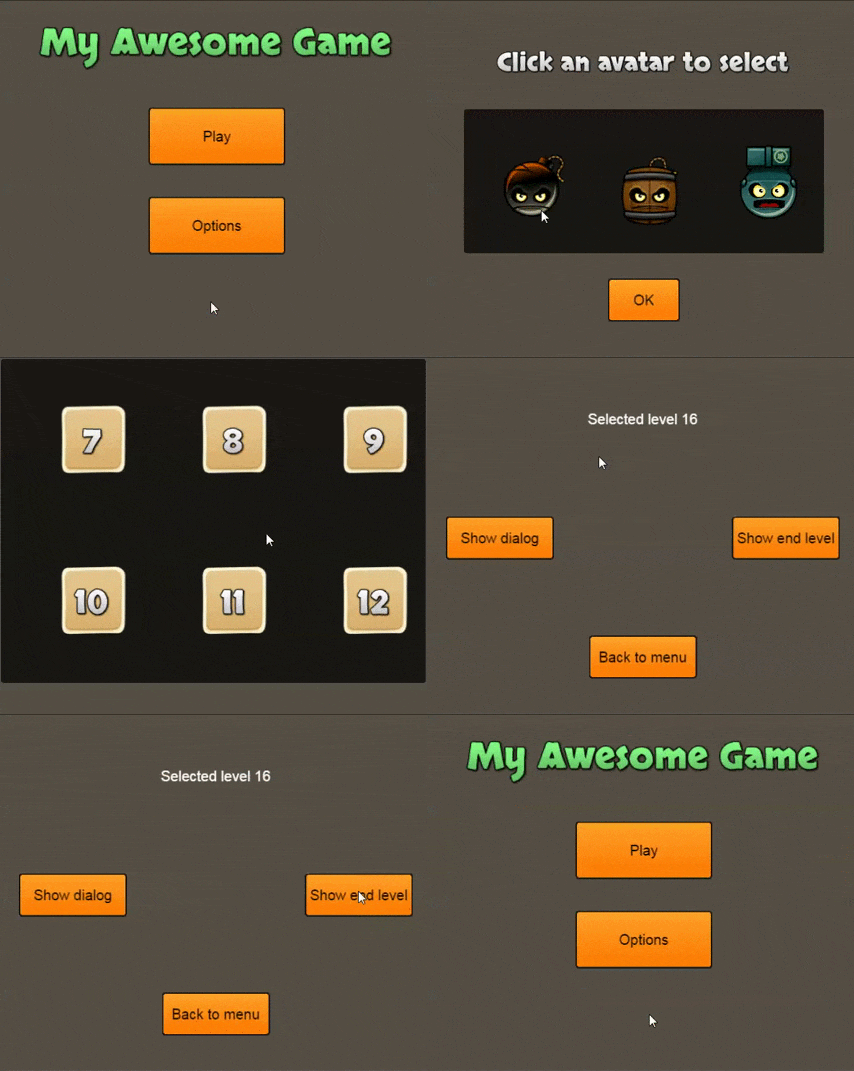
first, take a look at those cool examples 🙂
EZGUI main goal is to separate the GUI description/visual aspect from game code.
All gui elements and themes are described in JSON format, which can be stored in separate files keeping the code clean.
The only code you’ll need to write is the gui behaviour throught events binding, and if you want, add some animated transitions (EZGUI provide a simplified API for TweenJS).
The library is shiped with two themes, which will be enhanced in future version, those themes are based on kenney UI pack and feathers metalworks theme.
Loading gui component is very simple.
The following code load metalworks theme and create a gui element defined in mainScreenJSON json object
|
1 2 3 4 5 6 7 8 9 10 |
// EZGUI.Theme.load(['../../assets/metalworks-theme/metalworks-theme.json'], function () { var mainScreen = EZGUI.create(mainScreenJSON, 'metalworks'); //bellow line is only needed if we are using Pixi. //for phaser the gui element is implicitely added to the rendering queue stage.addChild(mainScreen); }); |
suppose that mainScreenJSON content is
|
1 2 3 4 5 6 7 8 9 10 11 12 13 14 15 16 17 18 19 20 21 22 23 24 |
// var mainScreenJSON = { id: 'myWindow', component: 'Window', header: { position: { x: 0, y: 0 }, height: 40, text: 'Header' }, draggable: true, position: { x: 0, y: 0 }, width: 500, height: 500, layout: [1, 3], children: [ null, { id: 'button1', component: 'Button', position: 'center', text: 'my Button', width: 200, height: 80 } ] } |
this will define a draggable window with a header, containing a child button in the center.
the button is in the center because we defined a layout of 1 horizontal element per 3 vertical elements, the first (top) child is null, the middle child is our button and we set its position to ‘center’.
if we create a gui element using the above JSON, EZGUI will give access to elements with IDs.
|
1 2 3 4 5 6 7 8 9 10 11 12 13 14 15 16 17 18 19 20 21 |
// //we can access to the main windows throught EZGUI.components.myWindow //we can access to the button throught EZGUI.components.button1 //setting event can be done like this EZGUI.components.button1.on('click', function(event, me) { //event represent the original Pixi or Phaser event //me represent the element receiving the event (here the button) }); EZGUI.components.button1.on('mousedown', function(event, me) { //... }); EZGUI.components.button1.on('mouseup', function(event, me) { //... }); |
let’s take a look at real example
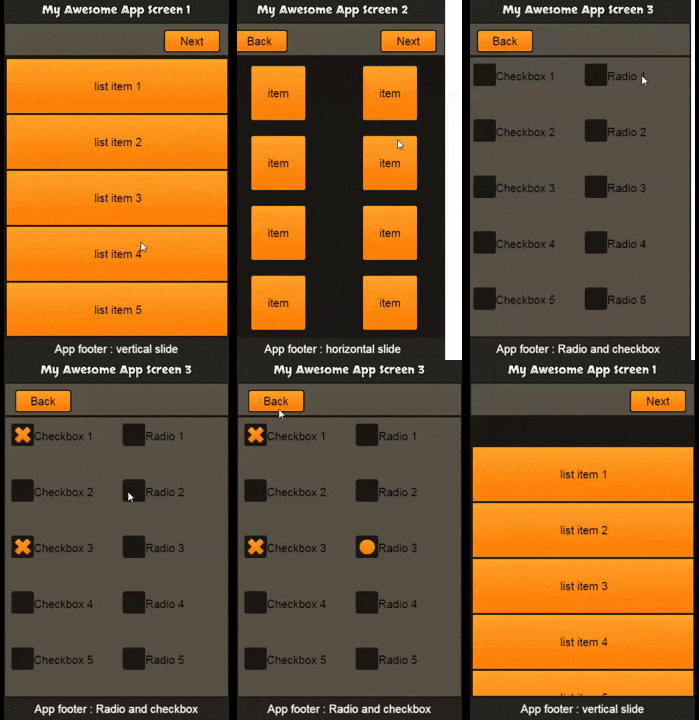
the interface bellow is intercative.
The source code to achieve this example in both Pixi and Phaser is as follow
All Gui screens are defined in this json file
Let’s initialize the library (Pixi or Phaser)
|
1 2 3 4 5 6 7 8 9 10 11 12 13 14 15 16 17 18 19 20 21 22 23 24 25 26 27 28 29 30 31 32 |
// // common variables var gameWidth = 400; var gameHeight = 640; //if you use phaser -------------------------------------------------- var game = new Phaser.Game(gameWidth, gameHeight, Phaser.AUTO, '', { preload: preload, create: create }); function preload() { //... your preload } function create() { //... your create } //if you use pixi -------------------------------------------------- var renderer = PIXI.autoDetectRenderer(appWidth, appHeight); renderer.backgroundColor = 0xffffff var stage = new PIXI.Container(); document.body.appendChild(renderer.view); requestAnimationFrame(animate); function animate() { requestAnimationFrame(animate); renderer.render(stage); } |
now that the library is initialized we can create our GUI
|
1 2 3 4 5 6 7 8 9 10 11 12 13 14 15 16 17 18 19 20 21 22 23 24 |
// var mainScreen; var secondScreen; var thirdScreen; EZGUI.Theme.load(['../../assets/metalworks-theme/metalworks-theme.json'], function () { mainScreen = EZGUI.create(mainScreenJSON, 'metalworks'); secondScreen = EZGUI.create(secondScreenJSON, 'metalworks'); secondScreen.visible = false; thirdScreen = EZGUI.create(thirdScreenJSON, 'metalworks'); thirdScreen.visible = false; // only add screens to stage if you are using Pixi // remove the bellow three lines if you use phaser stage.addChild(mainScreen); stage.addChild(secondScreen); stage.addChild(thirdScreen); //this function will define the GUI behaviours setupGUI(); }); |
at this stade, we can already see the main screen, but clicking the buttons wil not give any result.
now let’s write the gui behaviour
|
1 2 3 4 5 6 7 8 9 10 11 12 13 14 15 16 17 18 19 20 21 22 23 24 25 26 27 28 29 30 31 32 33 34 35 36 37 38 39 40 41 42 43 44 45 46 47 48 49 50 51 52 53 54 55 56 57 58 59 60 61 62 63 64 |
// function setupGUI() { EZGUI.components.btNext1.on('click', function () { secondScreen.position.x = gameWidth; secondScreen.visible = true; mainScreen.animatePosTo(-gameWidth, mainScreen.position.y, 800, EZGUI.Easing.Back.Out, function () { mainScreen.visible = false; }); secondScreen.animatePosTo(0, secondScreen.position.y, 800, EZGUI.Easing.Back.Out, function () { }); }); EZGUI.components.btPrev2.on('click', function () { mainScreen.position.x = -gameWidth; mainScreen.visible = true; secondScreen.animatePosTo(gameWidth, secondScreen.position.y, 800, EZGUI.Easing.Back.Out, function () { secondScreen.visible = false; }); mainScreen.animatePosTo(0, mainScreen.position.y, 800, EZGUI.Easing.Back.Out, function () { }); }); EZGUI.components.btNext2.on('click', function () { thirdScreen.position.x = gameWidth; thirdScreen.visible = true; secondScreen.animatePosTo(-gameWidth, secondScreen.position.y, 800, EZGUI.Easing.Back.Out, function () { secondScreen.visible = false; }); thirdScreen.animatePosTo(0, thirdScreen.position.y, 800, EZGUI.Easing.Back.Out, function () { //dlg1.visible = false; }); }); EZGUI.components.btPrev3.on('click', function () { secondScreen.position.x = -gameWidth; secondScreen.visible = true; thirdScreen.animatePosTo(gameWidth, thirdScreen.position.y, 800, EZGUI.Easing.Back.Out, function () { thirdScreen.visible = false; }); secondScreen.animatePosTo(0, secondScreen.position.y, 800, EZGUI.Easing.Back.Out, function () { }); }); } |
as you can see, all we did here is defining the interactions and transitions.
you can use this part of code to define specific behaviour and/or interactions with the game.
the most important thing is that the code is completely independant from a given game code.
you can even copy past it from a game to another, it’ll work the same way.
This is the main idea behind EZGUI, but there is more to come !
Because the library is mainly targetting game developement, we are planing to provide specific game UI components like : levels screen component, Hight score with stars component, Social share component …etc
You can already fork the current EZGUI version from girhub : https://github.com/Ezelia/EZGUI
Or visit the website : http://ezgui.ezelia.com/
your suggestions and contributions are welcome.
also feel free to report issues and submit PRs.


